
PackCTRL - Not your regular backpack!
As we grow up, certain things become part of who we are and define us. My backpack has been one of those things for a long time. The very first time I remember being associated with it was in a camp with my church. The pastor forgot the glue he’d use in a illustration, and so he asked, hopelessly, if anyone would have a glue. It was obvious nobody would, but I did! In another time, at the prom, two colleagues gave a speech, mentioning everyone’s most remarkable characteristic. Well, I was “the one whose backpack has everything you need”. In college, living 60Km away and going and returning everyday, my attachment to my bag increased even more.
PackCTRL
Even before I got my 3D printer, I started to think about how I could use it to escalate the meaning of the backpack that has everything you need. This was the begin of PackCTRL!
The first version had a few features:
- It was based on a military backpack, with modular pockets;
- A modular panel on the top, designed mainly to be an interface, with connectors and buttons;
- A 20Ah powerbank;
- A Raspberry Pi 2 model B;
You can see some of the few images left of it here.
I used it for a couple months, until 13th July, 2017. In that day, I took my father to see the doctor and left my backpack in the car. After an hour, I came back to it and the backpack was gone! Such a shame!
By then, I was at my second year of Mechatronics Engineering, and there was a deadline to register projects until 30th July. Ater mourning for the robbery, I decided it was time to shake the dust off and restart it!
And so it begins… I had three months to build the PackCTRL 2.0!
PackCTRL 2.0
Even before starting the project, I had a clear idea of the new features I wanted, and how I could enhance the features the first version had:
- A military backpack is a very good start point;
- The modular interface panel should be slightly different;
- An internal modular panel to accomodate, well, modules;
- Instead of a single big powerbank, a modular power system;
- Raspberry Pi 3 B, with dual boot (Raspbian and Retropie);
- More, different modules;
- A GPS tracker, for obvious reasons;
Modularity became a serious focus on the second version, as it makes the backpack flexible and suitable for my daily trips, for travelling and for other purposes - left to future demand.
The interface
Body
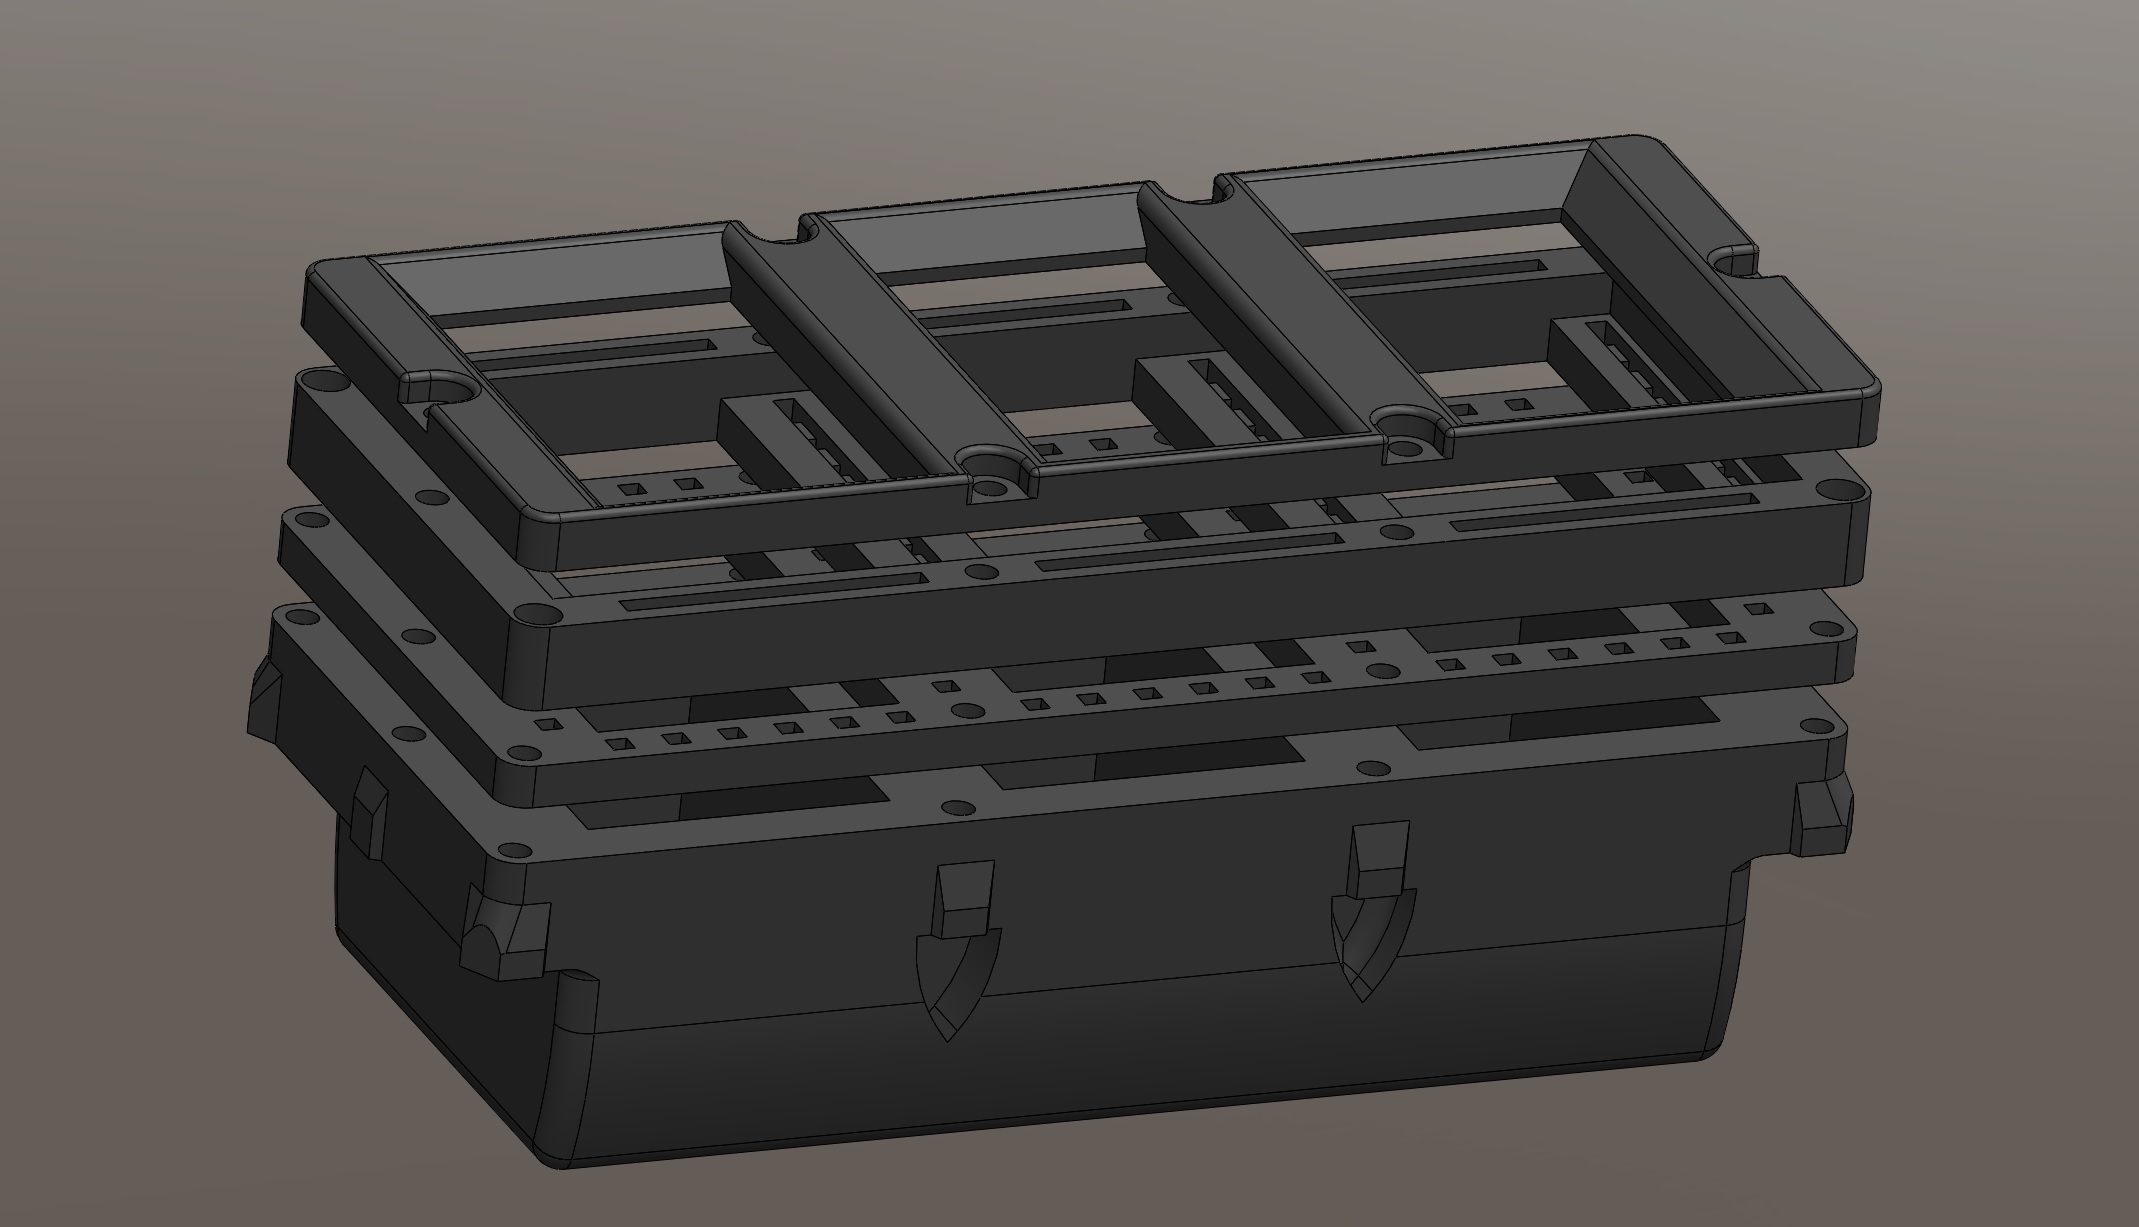
The body was composed of 4 parts. The two in the middle are stitched to the backpack. The bigger one houses the modules. The top one keeps the modules from coming out.
Modules
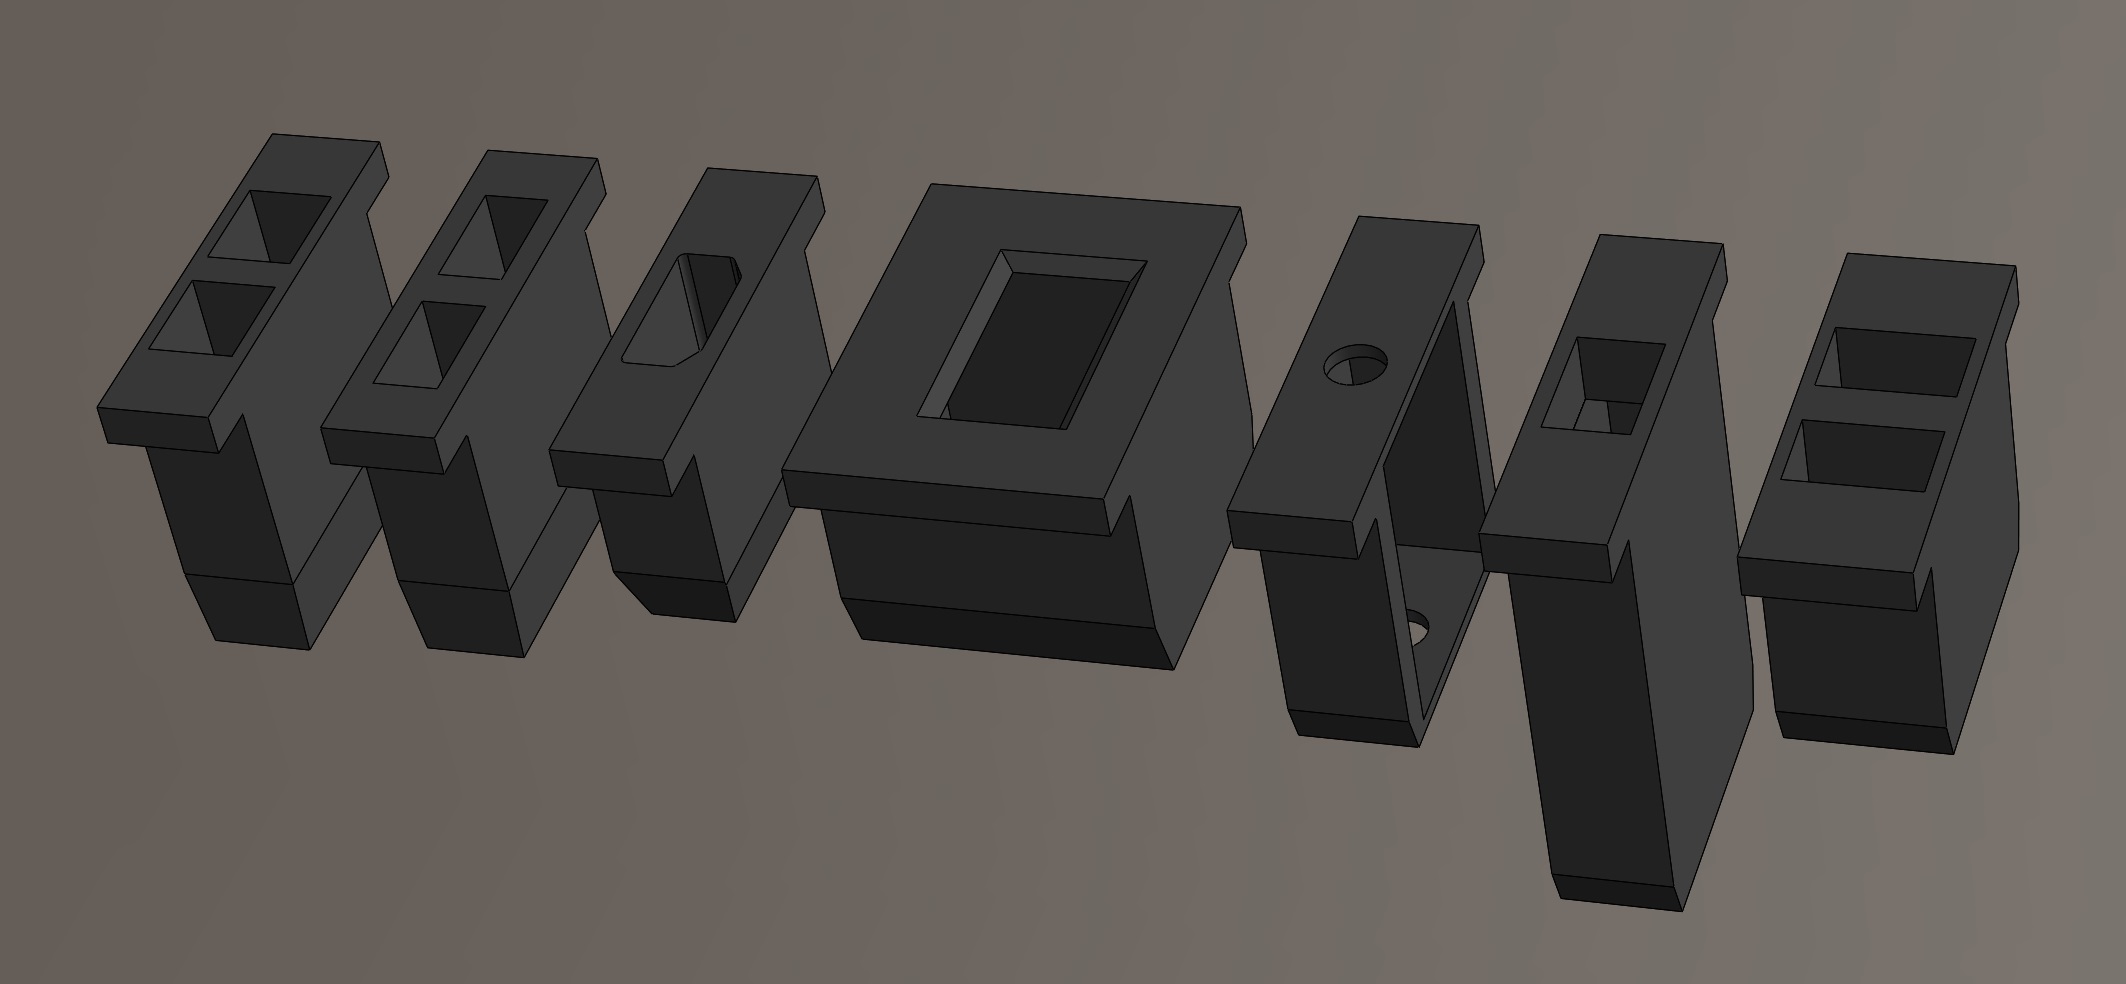
Many different modules were designed. Among them:
- Dual switch module;
- HDMI bridge;
- Internal lamp module;
- Digital clock module;
- P2 audio bridge;
- USB bridge;
Internal panel
The internal panel was removable, composed of horizontal stripes of Velcro, and free internal space to hide the GPS tracker;
PowerCTRL

This is the powerhouse of the backpack. It is a modular system of batteries, chargers and power distribution hub. All the power connections are base in P4 (5.5mm) connectors, which are easy to use even if I couldn’t see inside the backpack, despite being very bulky.
PowerBANK
The power storage units. Two models were created, with 2 or 4 cells. Each one had an internal charger and step-up (3V3 to 5V).
PowerCHARGE
To charge the batteries, I used a 12V to 5V step down. It was able to charge up to 5 PowerBANKs at once.
PowerHUB
To distribute power, I designed a simple hub, where PowerBANKs and other devices are connected in parallel. As for that time, I thought power consumption would be distributed equally between PowerBANKs, so, if each was capable of delivering 10W, I could consume 50W at once in other devices, which is a lot! Unfortunately, that was not the case, an this module proved to require further work.
Originially, it was called PowerSOURCE, but I renamed it to PowerHUB later.
PackUBIEST
Originally named PackVRESTO, this was the cherry on top (or very hidden inside) of the backpack. As this is a big project on its own, I will talk about it in another post.
The inner computer
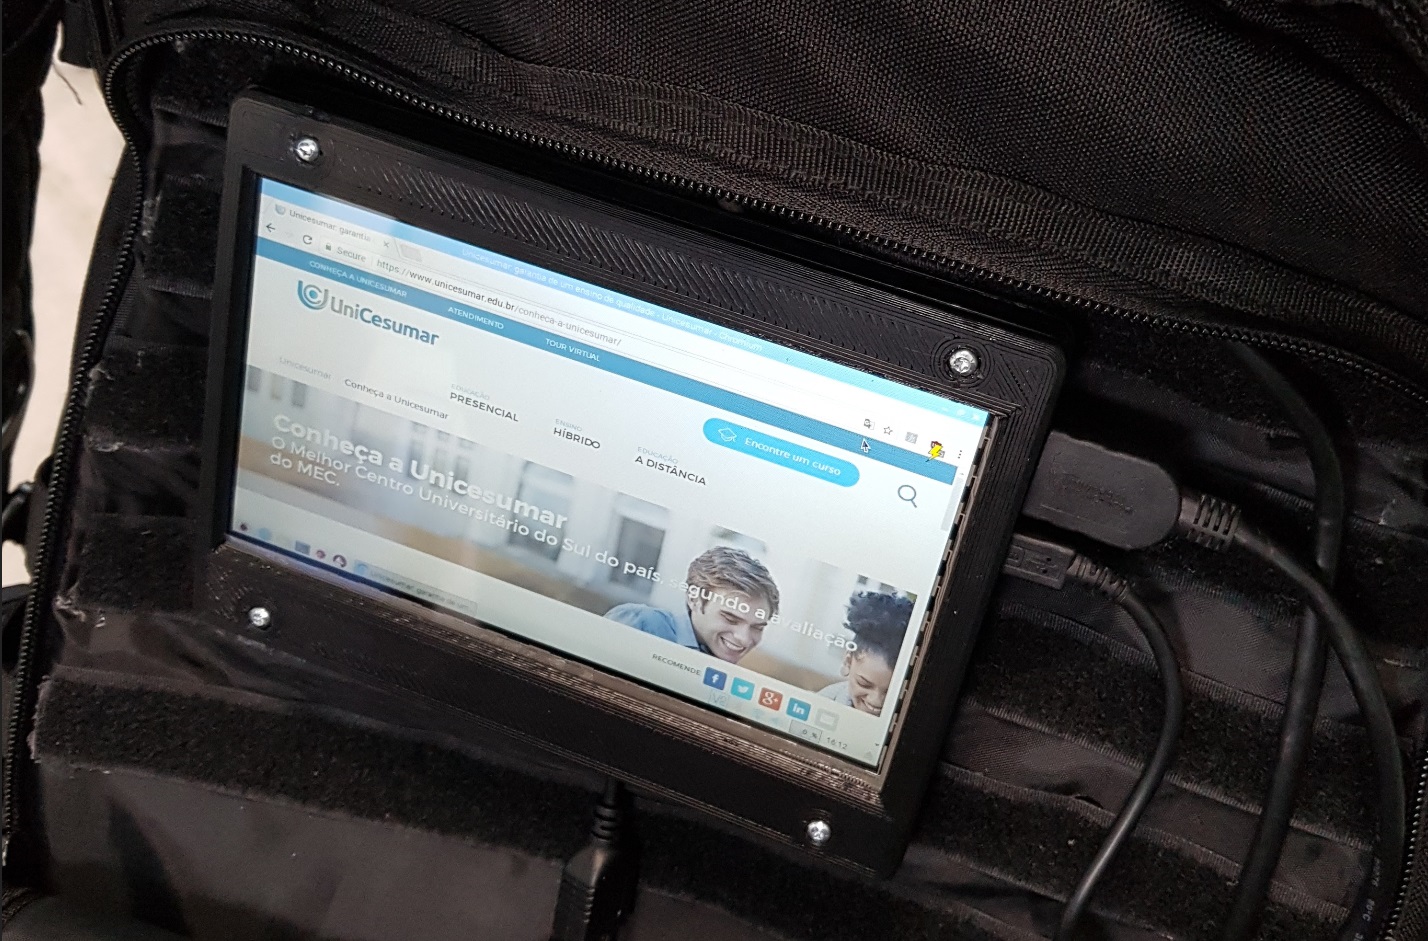
The original project had a Raspberry Pi 2 model B and a powerbank that kept it running, but I still needed to connect it to an external display. It was cool, but could be cooler. And so, the last feature added to the backpack was a 7” display. So I had a fully functional computer inside my backpack, which I used to write sheets and documents during classes, and also play during my daily trips.
Photo album
You can access this link to see more pictures of the project.